


Step-by-Step Guide to Installing a Parking Air Conditioner Without Professional Help
February 05, 2025
Installing a parking air conditioner (AC) can seem like a complex task, but with the right tools, preparation, and guidance, it’s entirely possible to do it yourself. This comprehensive guide will walk you through the process, provide tool recommendations, and address common issues like condensate water management and winter maintenance. Whether you're a DIY enthusiast or looking to save on installation costs, this guide is for you.
Why Choose DIY Installation?
Cost Savings
Professional installation can cost between 30% to 50% of the unit's price. For example, if your parking AC unit costs 1,000,professionalinstallationcouldaddanadditional300 to $500. By opting for DIY installation, you can save hundreds of dollars.
Customization
DIY installation allows you to tailor the setup to your specific vehicle, whether it's a truck, RV, or van. This flexibility ensures that the system meets your exact needs.
Satisfaction
Completing the installation yourself offers a sense of accomplishment and a deeper understanding of your vehicle's systems.
Pre-Installation Preparation
Tools and Materials
Before starting, gather the necessary tools and materials. Here’s a list of what you’ll need:
Basic Tools: Drill, screwdriver set, insulation tape, multimeter.
Specialized Tools: Vacuum pump (e.g., Robinair), refrigerant charging kit.
Materials: Sealant, insulation tubing, drainage hose.
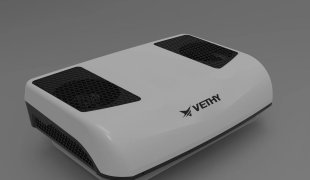
AC Unit: Choose a model that fits your vehicle and power requirements. Our company offers several models, including the VBPSOB, V4000, VSO1, and VSO2 Pro, each with different specifications to suit various needs.
Safety Precautions
Power Off: Always disconnect the vehicle’s battery before starting.
Refrigerant Handling: Avoid direct contact with refrigerant, as it can cause skin and eye irritation.
Step-by-Step Installation Guide
Step 1: Positioning and Mounting
Indoor Unit: Choose a location that doesn’t interfere with the driver’s view or seat movement. For example, in a truck cabin, the roof is often the best spot.
Outdoor Unit: Mount it securely using anti-vibration brackets. Ensure it’s tilted slightly to prevent water accumulation.
Step 2: Connecting Pipes and Wiring
Copper Pipes: Bend carefully to avoid kinks. The minimum bending radius should be at least 10 cm.
Electrical Connections: Use the correct wire gauge based on the unit’s power requirements. For example, the VBPSOB model requires 15-42A for 24V systems and 42-67A for 12V systems.
Vacuuming: Use a vacuum pump for at least 15 minutes to remove air and moisture from the system.
Step 3: Setting Up the Condensate Drainage System
Drainage Pipe: Ensure a slope of 3 cm per meter to prevent backflow.
Winter Protection: Add antifreeze or install a heating cable to prevent freezing.
Testing and Commissioning
Initial Test: Check for leaks and ensure the system cools effectively.
Common Issues: If the unit isn’t cooling properly, check for refrigerant leaks or incorrect wiring.
Long-Term Maintenance
Seasonal Care: Clean filters monthly during summer and drain the system in winter.
Component Replacement: Replace refrigerant every two years and inspect seals regularly.
Frequently Asked Questions (FAQ)
Q1: What if the power cable overheats?
A1: Upgrade to a thicker cable, preferably 6 mm² or more.
Q2: Why is water dripping inside the cabin?
A2: Check the drainage slope or install a water trap.
Q3: Can the unit operate in cold weather?
A3: Install a preheating module, such as those from Danfoss.
Additional Resources
Video Tutorials: Links to step-by-step videos on platforms like YouTube.
Purchase Links: Recommended online stores for tools and parts.
Community Forums: Engage with other DIY enthusiasts on forums like Truckers Forum or RV.net.
By following this guide, you can successfully install a parking air conditioner without professional help. Not only will you save money, but you’ll also gain valuable skills and a deeper understanding of your vehicle’s systems. Happy installing!
Quantifiable Data and Specifications
To further support the installation process, here are some specific data points and specifications from our main parking AC products:
VBPSO3 Model
Dimensions: 400mm x 490mm x 330mm
Power: 24V (350-1000W), 12V (500-800W)
Cooling Capacity: 2400W (24V), 1800W (12V)
Compressor Speed: 1000-3000r/min (24V), 1000-2500r/min (12V)
Refrigerant: R134a (600±5g)
V4000 Model
Input Voltage: 48V, 110V, 220V
Cooling Capacity: 4000W
Consumption Amps: 45A
Refrigerant: R410A (900g)
Dimensions: Outer - 86.2x98.8x19cm, Inner - 49.3x30.5x13cm
VSO1 Model
Cooling Capacity: 2200W (12V), 2800W (24V)
Refrigerant: R32 (650g)
Running Time: Up to 18 hours
Noise Level: Very quiet operation
Dimensions: Outer - 825mm x 980mm x 180mm, Inner - 355mm x 355mm x 185mm
VSO2 Pro Model
Cooling Capacity: 2000W (12V), 2400W (24V)
Refrigerant: R32 (650g)
Running Time: Up to 18 hours
Noise Level: Very quiet operation
Dimensions: Outer - 680mm x 980mm x 180mm, Inner - 355mm x 355mm x 185mm
These specifications provide a clear understanding of the capabilities and requirements of each model, ensuring you choose the right unit for your needs and install it correctly.
Keywords for SEO Optimization
DIY parking air conditioner installation
Step-by-step AC installation guide
Parking AC maintenance tips
Best tools for AC installation
How to install a truck air conditioner
RV air conditioner setup
Parking AC condensate management
Winter AC maintenance guide
By incorporating these keywords naturally throughout the article, we can improve its visibility on search engines, making it easier for users to find this valuable resource.